URL Redirects
When you rename or delete a page, send visitors — and search engines — from the old address to the new one.
Open ⚙️ Site Admin ▾ → ↪️ Redirects. Your rules are stored in .webhaste/redirects.json.
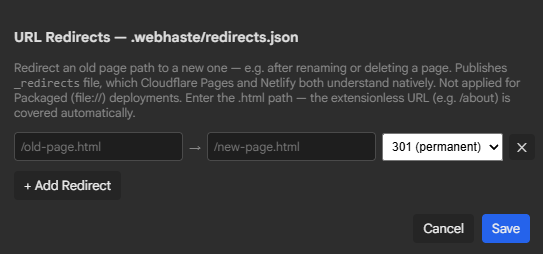
Adding a redirect
- Click + Add Redirect.
- In From, enter the old page's path, like
/old-page.html. - In To, enter where it should go: another page on your site (
/new-page.html) or a full web address (https://example.com/somewhere). - Choose the type: 301 (permanent) for a page that has moved for good, or 302 (temporary) for a short-term detour.
- Click Save.
Enter the .html path. The same address without the extension (/old-page) is covered automatically — which matters, because Cloudflare Pages and Netlify show pages without .html, so that's the address people and search engines have actually been using. A 301 tells search engines to move the old page's standing to the new address.
Where redirects work
When you publish, WebHaste writes a _redirects file that Cloudflare Pages and Netlify both read natively. A few limits to know:
- Other hosts — GitHub Pages and plain SFTP hosting, for example — ignore the file. For those, you can leave a small page at the old address whose Header code contains
<meta http-equiv="refresh" content="0; url=/new-page.html">. - A Packaged copy that opens from disk has no server to do redirecting, so it doesn't include them.
- If you later create a new page at an address you'd redirected, delete the redirect. On Cloudflare Pages the redirect still wins over the real page; on Netlify the real page wins. Either way, an old rule left behind is confusing.
After renaming a page, also run Check Links to find menu items and links that still point at the old address.
 Topics