Your First WebHaste Site: A Simple Checklist

Your first WebHaste site doesn’t need to be clever. It needs to be done: a clean folder, a few real pages, a preview that matches reality, and a deploy you can repeat next time without re-learning everything.
This is the fastest path to that first win.
The goal: a clean first deploy (not a perfect website)
If you’re coming from WordPress (or any “dashboard CMS”), your instincts will try to optimize for themes, plugins, and settings. WebHaste works better when you optimize for something simpler:
- A small set of pages you can maintain
- A predictable structure (future-you will thank you)
- A deploy that feels boring (boring is stable)
Before you start (5-minute setup)
What you need
- WebHaste installed
- A folder on your computer to hold the site files
- A deployment target (Cloudflare Pages or Netlify) if you want to publish today
What you don’t need yet
- A custom domain (nice later, not required today)
- A complex design system
- A database, server, or “CMS hosting plan”
Optional but recommended: decide now whether you want Git for backups/history. It’s not required to ship your first site, but it’s a great habit once you’re moving.
Build the minimum viable pages
For a small site, the “minimum pages” set is usually:
- Home (what this site is, who it’s for, what to do next)
- About (credibility + context)
- Contact (how a human reaches you)
- Privacy (especially if you add analytics later)
If you’re building for a client, add one more:
- Services (or “What we do”) so the site can actually convert
Optional: start from a template instead of a blank folder
If you want a fast start, clone a starter template and edit it instead of building from scratch:
Add navigation + basic SEO (the boring stuff that pays off)
Navigation sanity check
Your nav should answer: “What are the 3–6 things a visitor might do here?” Keep it small. If you need a mega-menu on day one, you probably need a simpler site.
- Home
- About
- Services (optional)
- Contact
Metadata + social previews (keep it simple)
At minimum, make sure each page has:
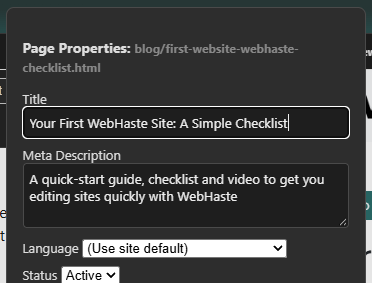
- A clear page title
- A short meta description (1–2 sentences)
- Note: OpenGraph/Twitter tags are generated at publish
Assets: where images/files go so you don’t hate yourself later
Decide early where things live. WebHaste sites keep uploaded media in the /assets folder, and these files are available for use on all pages via the "Assets" button. Other site elements (other than pages) may be stored in two different folders, too. The three WebHaste content folders are:
- Images, PDFs, files needed by pages:
/assets - Favicons, backgrounds, template images:
/elements - CSS/JS
/scripts
Any images or files stored outside of these three folders does NOT get deployed.
Preview like you mean it
Preview is where you catch the stuff that makes a site feel “unfinished”: broken links, weird spacing on mobile, missing images, and placeholder text you forgot you pasted at 1am.
Responsive checks
- Desktop: does the layout breathe?
- Tablet: does the nav look right? (test again after deployment)
- Phone: is anything unreadable or overflowing?
Link checks + packaged render check
- Review every nav item (disabled in preview, test again after deployment)
- Review your main CTA buttons/links
- Make sure images load (no broken paths)
- Pro tip: Test-render a packaged deployment to catch path issues early
Deploy (pick one)
You’ve got two built-in “free and fast” options. Pick the one you already have an account for.
Cloudflare Pages
- Configure your Cloudflare account
- Create a Pages project
- Retrieve connection info (Account ID, Project Name, API Token)
- Deploy and open the live URL
Netlify
- Configure your Netlify account
- Create a new site/project
- Retrieve connection info (Site ID, Personal Access Token)
- Deploy and open the live URL
Post-launch (10 minutes)
This is the part most people skip. Don’t. Ten minutes here saves you hours of “why is this broken?” later.
- Test the live site on phone + desktop
- Check all nav links and buttons
- Verify HTTPS is enabled
- Spot-check page content and layout (are images extending outside of the page, etc)
- Confirm your contact method works (email link or embedded form)
Optional upgrades (nice next steps)
- Submit
sitemap.xmlto search engines - Test your 404 page
- Add a simple Git workflow for backups + rollback
- Add analytics (optional)
Install WebHaste + grab the checklist
If you want the fastest possible start, do these things:
- Install the extension
- Use the checklist once, end-to-end, without “improving” it mid-flight
- Watch our quick-start tutorial video (above)
Download the WebHaste Site Checklist (pdf)
 Recent Articles